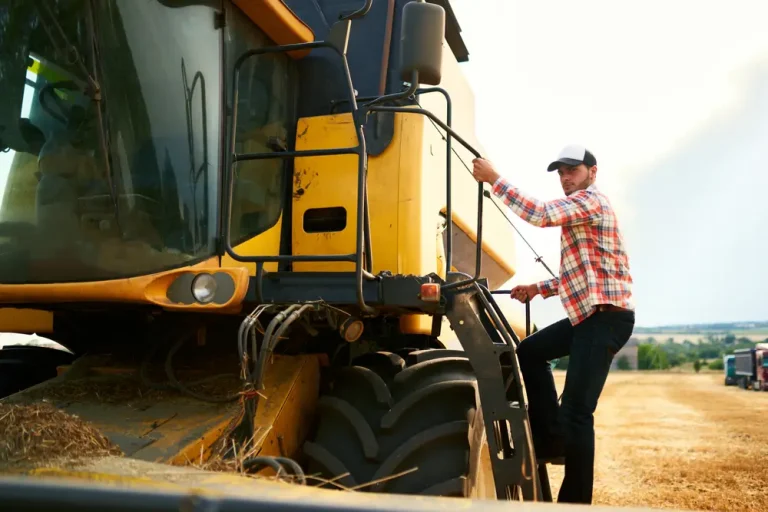
Turns out the rocky, clay-heavy soils around Toulouse can dull these mulcher teeth up to 30% more quickly than other parts of France. Left unattended, dull teeth will waste your time and money, risk your equipment and even cause damage.
How often should you replace forestry mulcher teeth
How frequently you should replace mulcher teeth boils down to usage and the type of material you’re working with. Most operators can expect 200 to 500 hours from a set of forestry mulcher teeth, but this is contingent on a few factors. Teeth on average, last about 50 – 100 hours before they begin to wear away. If you work hardwoods or grind stumps, expect even shorter experiences– sometimes as low as 30 to 50 hours. This is due to dense, hard wood and unseen rocks putting more pressure on the teeth. The more frequently you operate your machine, the more quickly the teeth will wear down. Daily or high frequency work will imply more changes.
It makes you pay attention to your machine’s usage. Keep note of the hours and type of material mulched. Keep track of where you hit worn teeth, so you can replace them just in time and keep your rig running smooth. A basic service log will do wonders. Record the hours utilized and dates when you swapped out the teeth. It anticipates future updates and maintains equipment in peak condition.
The table below shows general guidelines for changing mulcher teeth based on hours and material type:
| Material Type | Typical Lifespan (hours) | Suggested Change Interval (hours) |
| Softwood/Brush | 100–200 | Every 80–100 |
| Mixed Wood | 50–100 | Every 50–80 |
| Hardwood/Stumps | 30–50 | Every 30–50 |
Routine inspections are crucial. Check for chips, cracks, or blunt edges. A few people use a paint marker to identify worn spots, so nothing gets overlooked. Smart maintenance and early swapping prevent major fixes and keep things flowing.
Signs it’s time to replace your mulcher teeth
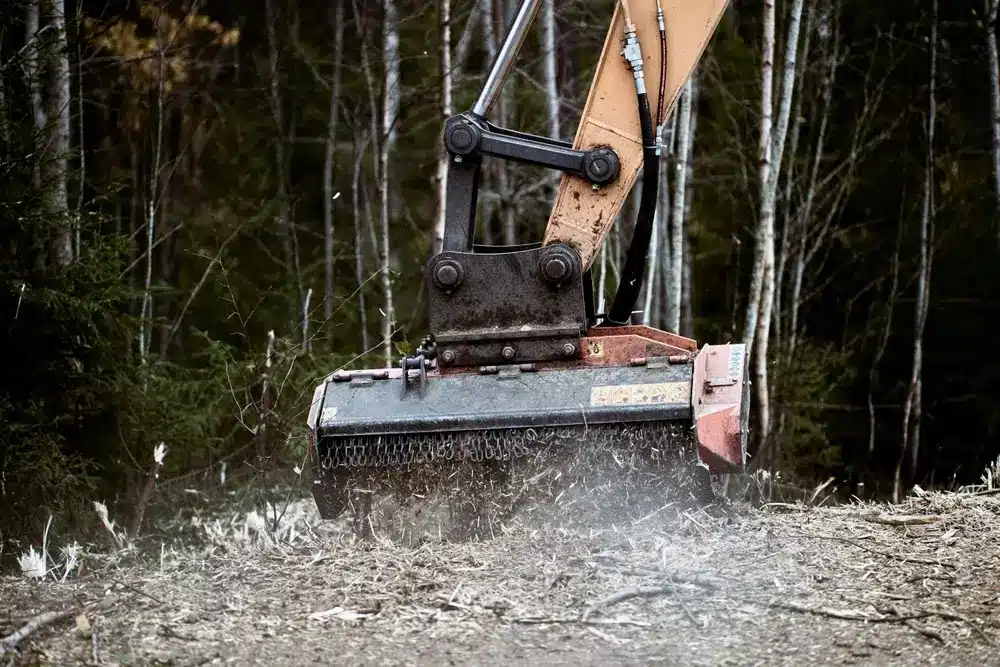
Checking mulcher teeth regularly is essential for maintaining your machine in prime condition and safe to operate. Most users begin with a glance at the bleeding edge. If you notice chips, cracks or a rounded edge, it means the teeth have dulled. These are key indicators they aren’t slicing as efficiently as they ought to. When blades get dull, you may have to push the machine harder, or it could shake more. Both signs that it’s time to switch teeth.
Slowed mulching speed is another obvious canary. So if your machine seems to be taking a long time to grind up wood, or you hear odd noises as it operates, these are not typical. Excess vibration or strange noises can indicate that the teeth are worn or even fractured. If you see any cracked or lost teeth, replace them immediately. This prevents further injury and maintains flow calm and secure.
Daily checks allow you to catch issues early. A daily glance at your teeth ensures that you catch minor chips or cracks before they become major. If you’re working with hard wood or stumps, anticipate teeth to wear out quicker—say, every 30 to 50 hours. For regular work, teeth hold up 50 to 100 hours. Sharpening is necessary if your head features solid blades. Daily inspections and routine hones maintain the cut crisp and sleek.
Don’t bypass other tests. Grease the rotor bearings in the evening, when they’re warm. Oil moving parts every 8 hours. Inspect belt tension each 100 hours. Each time a new season begins, inspect all components for wear and lubricate thoroughly.
What to expect in terms of cost
Swapping mulcher teeth isn’t merely a matter of purchasing new components. It’s a combination of initial expenses, maintenance and unexpected costs that soon add up. Premium teeth are more expensive, but they can last as long as 100 hours. Less expensive teeth might only provide 50 hours. If you select less expensive teeth, you’ll purchase and install new ones more frequently. That equates to increased downtime and expensive labor switching them out – which really adds up over time.
Inconvenient replacements can drag work, particularly if you have to lug machines to a store. Hauling costs can be $5 a mile and time spent lugging gear is profit lost. Manure isn’t free, either, and every hour spent swapping teeth is an hour not spent mulching. For others, tooth wear expenses hit $2,400 per 400 hours, or approximately $8 per hour the machine runs. Maintenance—oil, filters, grease, etc.—runs roughly $10 an hour. Toss in track wear in rough ground, which can run around $400 per month, and it’s obvious that keeping a mulcher rolling ain’t cheap.
If you’re making the investment, the true cost of ownership needs to include all these things. Fuel, for instance, can cost $25/hr when you include repairs and other requirements. Hoses and other components break as well, with one hi-flow hose costing $500 plus. In the grand scheme, swapping out gear every 3 years might run you around $140,000 — or $383 per day.
Key cost considerations:
- Upfront teeth price compared to frequency of replacement
- Labor and downtime for each swap
- Hauling and transport fees
- Regular upkeep and track wear
- Fuel and part replacement costs
- Total ownership expenses over time
How to choose the right teeth for your mulcher
Selecting the appropriate mulcher teeth begins with understanding what you mulch the most. Varied teeth types cut best for varied tasks. For hardwood, stumps or gnarly roots, select teeth designed to endure and slice through hardy wood. If you primarily mulch softwood and brush, lighter teeth may do just fine and cost less in the long run. Hardcore tasks, or regular use, require premium teeth, such as carbide, that resist abrasion.
Always verify the specs from the manufacturer. Teeth not designed for your mulcher model can cause bad fitting or additional breakdowns. Consider the rotor type on your machine as well. Certain rotors, such as FGT, utilize a unique lacing pattern and require corresponding teeth. Applying the wrong teeth destroys performance and can even break your gear.
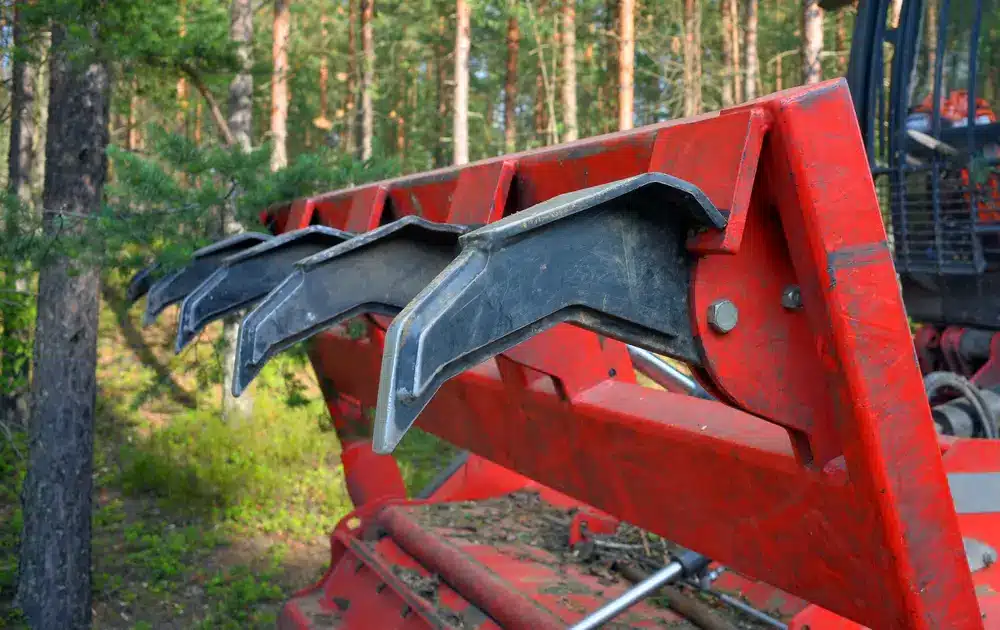
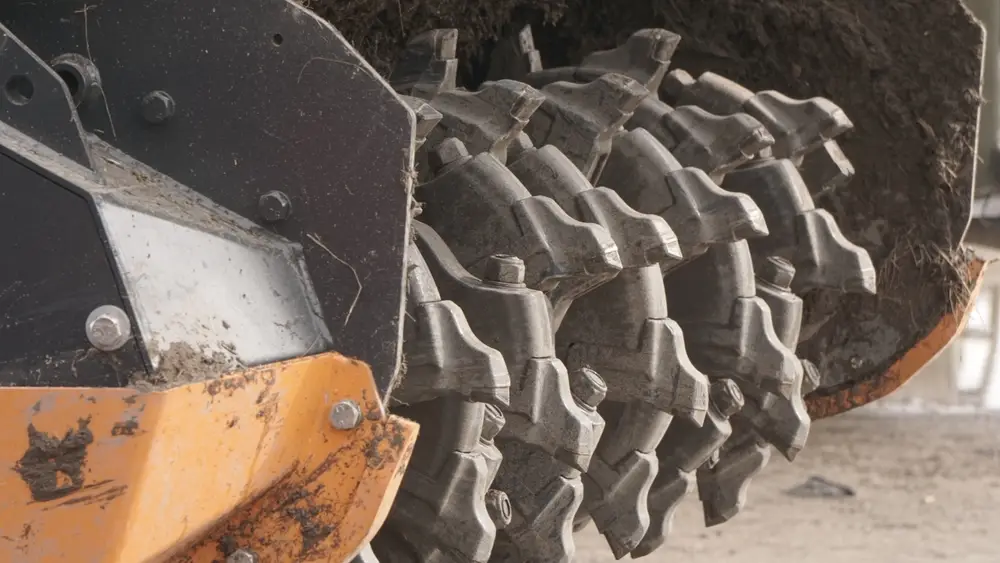
There are various types of teeth. For instance, carbide teeth remain sharp longer and are ideal for hard materials. Hammer teeth are ideal for mixed material and general tasks. Cubit knife teeth cut clean and fit lighter work. All of them have trade offs.
- Carbide teeth:. . * Pros: Long life, stays sharp, good for hard wood.* Cons: Cost more, can break if hit rocks
- Hammer teeth:. . * Pros: Handles mixed material, easy to change.* Cons: Wears faster on hard wood
- Cubit knife teeth:. . * Pros: Clean cut, best for soft material.* Cons: Not for hard or heavy jobs
Teeth can last anywhere between 30 and 100 hours. Routine inspections and replacing damaged chompers keeps them going! Track or record worn spots for simple maintenance. Will-fit” teeth can save a few bucks upfront, but typically wear out quick and end up costing more overall.
Daily care to extend tooth and mulcher lifespan
Care keeps mulcher teeth sharp and your machine running strong. Mulcher teeth get their hands dirty. They shatter wood, brush, and dense ground cover. That equates to hard use on a daily basis. If you bypass regular upkeep, the teeth lose their edge quick. That bogs you down and prematurely exhausts the entire machine. Sharpen teeth frequently to keep the cut fresh and extend the working life. A dull tooth grinds harder and requires more power, which wears out the drive and burns more fuel. For maximum effectiveness, hone teeth after each complete day in the field or more frequently if you operate in rocky or sandy soil.
Brush out and clean off any mud, plant matter or stones after each use. This allows you to easily identify fractures, deformations or missing pieces. Inspect the teeth by visually examining and running your finger over them to detect rough areas or sharp edges that feel eroded. Highlight the damaged areas so you can swap teeth prior to the following task. This step breaks big repairs and keeps mulching smooth. Daily checks assist in catching early problems with the undercarriage, spindles, and control systems. For spindles, replace oil and grease every 500 hours or annually, whichever is sooner.
Use the appropriate tooth for your mulcher and the task. Cheaper teeth may save you money today but they’ll break down quicker and damage other components, like tool holders. Straighten your teeth and lubricate moving parts. This reduces tension and distributes fatigue more uniformly.
Essential maintenance tips:
- Sharpen after each use, or sooner in hard soil.
- Clean and inspect teeth for cracks, chips or bend spots
- Mark and track worn teeth for easy swaps
- Tip #2. Choose the correct tooth type for your mulcher and task.
- Grease and oil spindles yearly or after 500 hours
- Check undercarriage and controls for leftover debris
Step-by-step process to replace mulcher teeth
Replacing mulcher teeth is a task which requires the proper tools and some attention. Forestry mulcher teeth can wear for 30 to 50 hours when grinding hard wood or stumps, and up to 100 hours with lighter grinding. A daily inspection catches damage at its onset. Highlight any worn tooth so you know which to replace next. Keeping replacement teeth and required tools, such as a socket or Allen wrench, readily available expedites the task.
The steps below lay out a clear way to switch out mulcher teeth:
- Collect all components and tools before beginning. That implies new teeth, hand tools, and safety equipment. If your machine employs bolts, verify that you possess the appropriately sized socket or Allen wrench.
- Check tooth and ensure machine is disengaged and safe. Identify any teeth with chips, heavy wear, or cracks.
- Loosen and take out the bolts or screws. A few teeth may require a little oil to loosen if jammed.
- Pull out the old teeth. Wipe out the seat prior to installing new ones so they sit flush.
- While you’re at it, put the new teeth in, ensuring each one is aligned properly. If grinding or sharpening, maintain the 45 degree angle to the edge.
- Snug all bolts or fasteners. Don’t over-tighten because it can strip threads or snap bolts.
- Look at the spacing between all teeth. Uneven teeth can lead to vibration or suboptimal mulching.
- Start the mulcher in low gear. Pay attention to strange noises and monitor for wobbles.
Avoid cheap, or “will-fit” teeth unless you’re familiar with their quality. Bargain bin teeth wear out swift and damage total tool life. Nice maintenance makes the machine run better and last longer.
Common mistakes to avoid when replacing mulcher teeth
Timely replacement of mulcher teeth keeps your gear in shape. Wait too long, the teeth wear through and that can break other stuff. That pushes up costs and bogs down work. Not all teeth match each other, that’s why a mixture of types or even brands can cause some to wear quicker than others. If a single tooth gets worn more than the others, the entire mulcher can run rough. Trust me, stick to the same kind and brand when you swap teeth.
Skipping check-ups or missing grease jobs can damage performance. Worn teeth and missed checks translate into more drag on the machine. Inspect your teeth for chips and wear after each gig. Certain components, such as the head, require oiling every 8 hours. Grease the rotor bearings and belt tensioner every 50–100 hours. Keep the belts tight—check belt tension every 100 hours. Skip these, and you jeopardize the entire mulcher clogging up.
If you overload the mulcher or push too fast, parts wear down quick. Always operate the mulcher at the speed the manufacturer says is optimal. Back off if you encounter large roots or hard wood. Overloading requires that the engine and teeth work harder, which can burn out the system sooner.
In the winter, keep the mulcher clean and dry. Scrub it and grease it all the moving components. This prevents corrosion and leaves it primed for the next task. Identify worn teeth areas prior to replacing. If you don’t you can leave a trouble spot and boost expenses down the road.
Hone edges sufficiently. Too much grinding, too much heat, and it would destroy their potency. Check the steel blades on a daily basis and sharpen as required to maintain clean cuts.